On this guide
Get started
Manage
Projects
A project is a single app you build by chatting with the agent. Every project lives in its own GitHub repository and deploys to GitHub Pages on your account (free static sites) or to your own DigitalOcean account (full apps); we never hold your code.
Create form
Open the workspace, click "Create project", and fill in the short form.
- Name. Becomes the URL slug and the GitHub repository name. Lower case, hyphens, numbers; you can rename later.
- Description. One line about what the project is for. Shown in the project list and in the GitHub repository.
- Front-end. Pick "Basic" for a starter front-end, or "None" if your project is back-end only (an API or a worker).
- Back-end. Pick "Included" for a starter back-end, or "None" if the project is a static front-end.
- Database. Tick if the project will store anything. The database is provisioned on first deploy, not now.
- File storage. Tick if users will upload files (photos, attachments, anything bigger than a few KB).
- Scheduled tasks. Tick if the project will run something on a schedule (a daily email, a nightly cleanup).
- Background tasks. Tick if the project will run work that takes longer than a request (sending email, processing uploads). Pick the database engine for the queue; "Database" is fine to start with.
- Repository visibility. Public means the GitHub repository is visible to the world. Private keeps it inside your GitHub account. You can change this later.
- Cost breakdown. For DigitalOcean projects, a small table itemises the monthly and hourly cost of each add-on you ticked (web service, database, file storage, scheduled tasks, background tasks). The numbers come from DigitalOcean's published pricing; the project bills on your DigitalOcean account, not on MakerLoft. GitHub Pages projects show $0 / month - GitHub hosts them free on your account.

Hosting mode
When you create a project, the first choice is where it runs. Two modes; you can have projects of both types in the same workspace.
- GitHub Pages. A website made of pages, styles, and small interactions. Free to host on your GitHub account. Cannot sign people in, cannot store data, cannot accept file uploads. Perfect for landing pages, portfolios, brochure sites, documentation.
- DigitalOcean. A full app that can sign people in, save their data, and store files. Deploys to your own DigitalOcean account; hosting starts around $5 per month and you pay DigitalOcean directly.
Pages projects skip a lot of the rest of the guide on purpose: no deployment targets, no Setup or Add-ons tabs, no live preview, no error monitoring. The project page is just chat plus a "Site" card showing the live URL. Pick DigitalOcean instead if the very first thing you need is one of those features.
You cannot change a project's hosting mode after creation. If you start on Pages and later need accounts or data, create a second project on DigitalOcean and ask the agent to port the UI across.
Project layout
The project page is split into three columns at desktop sizes: the chat sidebar on the left, the chat in the centre, and a deployment / activity panel on the right. Below the centre column sit the alerts panel and the activity feed.
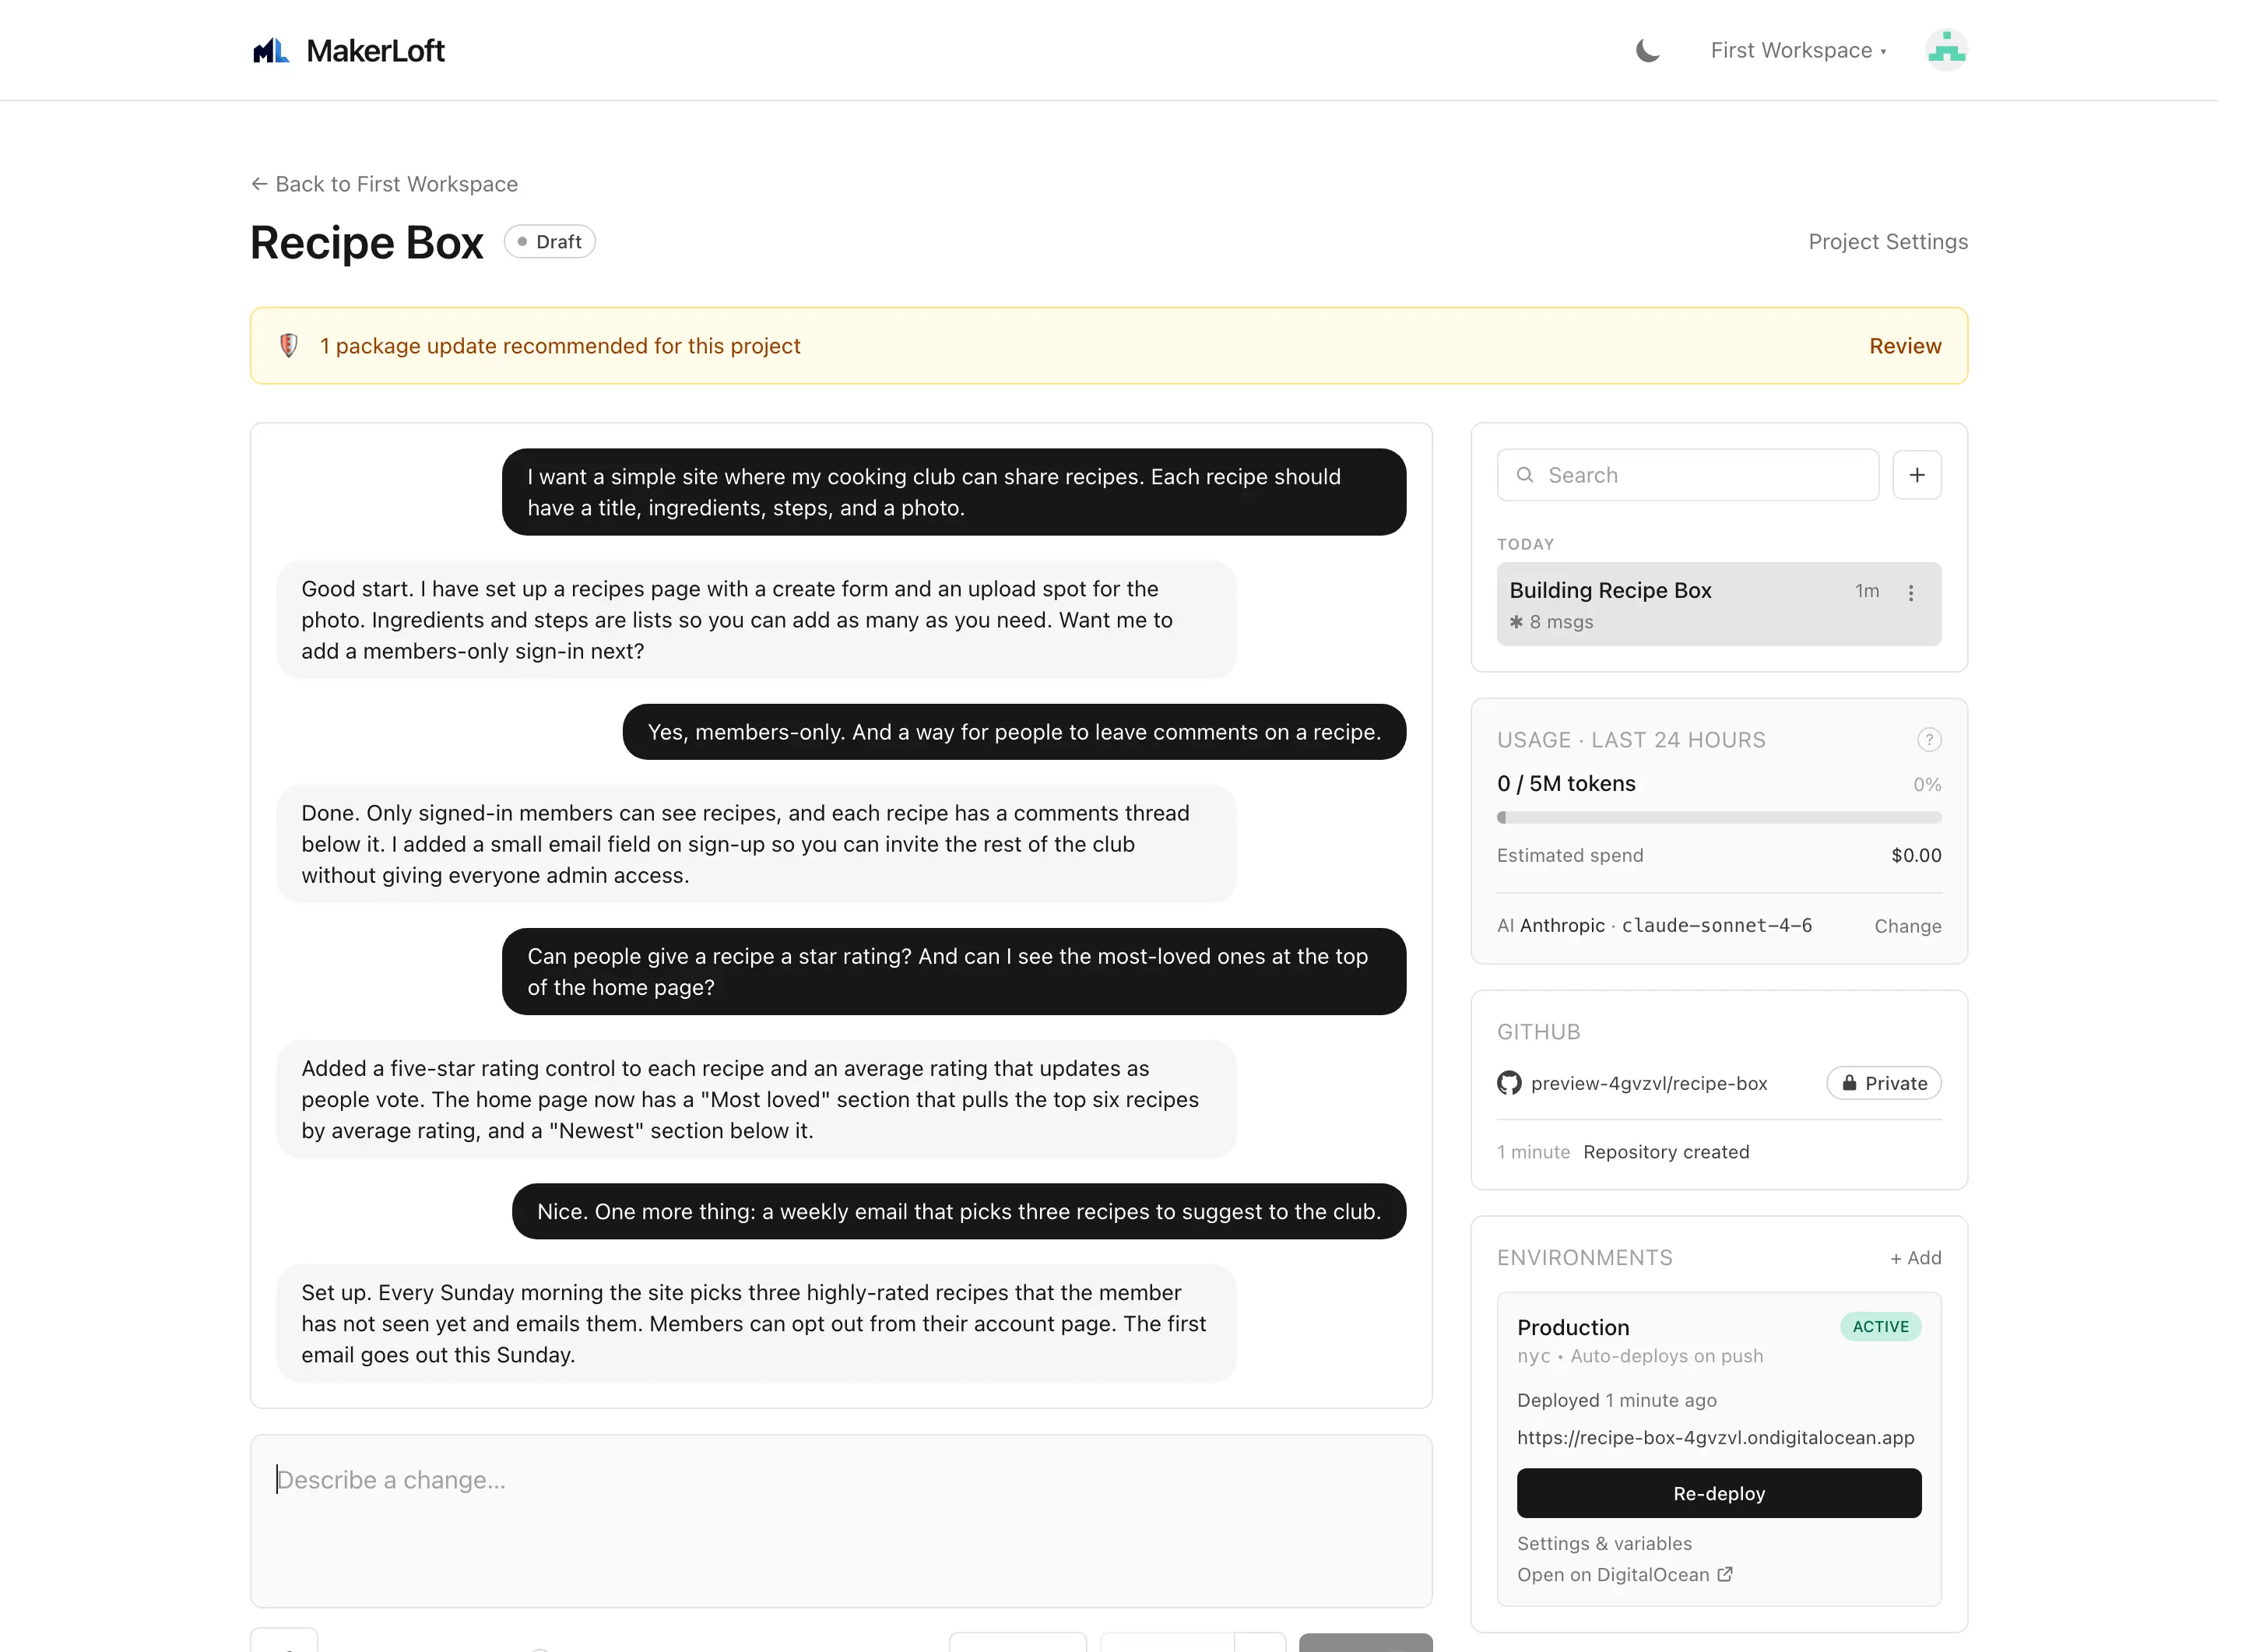
Threads sidebar
A thread is one conversation with the agent. Each project starts with one default thread; you can create as many as you like. Threads are useful for keeping different lines of work separate (one for the home page, one for the admin area, one for a tricky bug).
- New thread. The plus button at the top of the sidebar.
- Search. Filter threads by title.
- Rename. Click a thread title to edit. The agent auto-titles a thread after a few messages if you have not picked a title.
- Delete. Threads have their own delete button; the messages inside are gone forever once a thread is removed.
Alerts panel
Sits above the chat when something needs your attention. Build failures, deploy failures, runtime errors from the deployed app, and package vulnerability alerts each show as a single row with a short message and a button. Each row is dismissible.
See also: Security advisories.
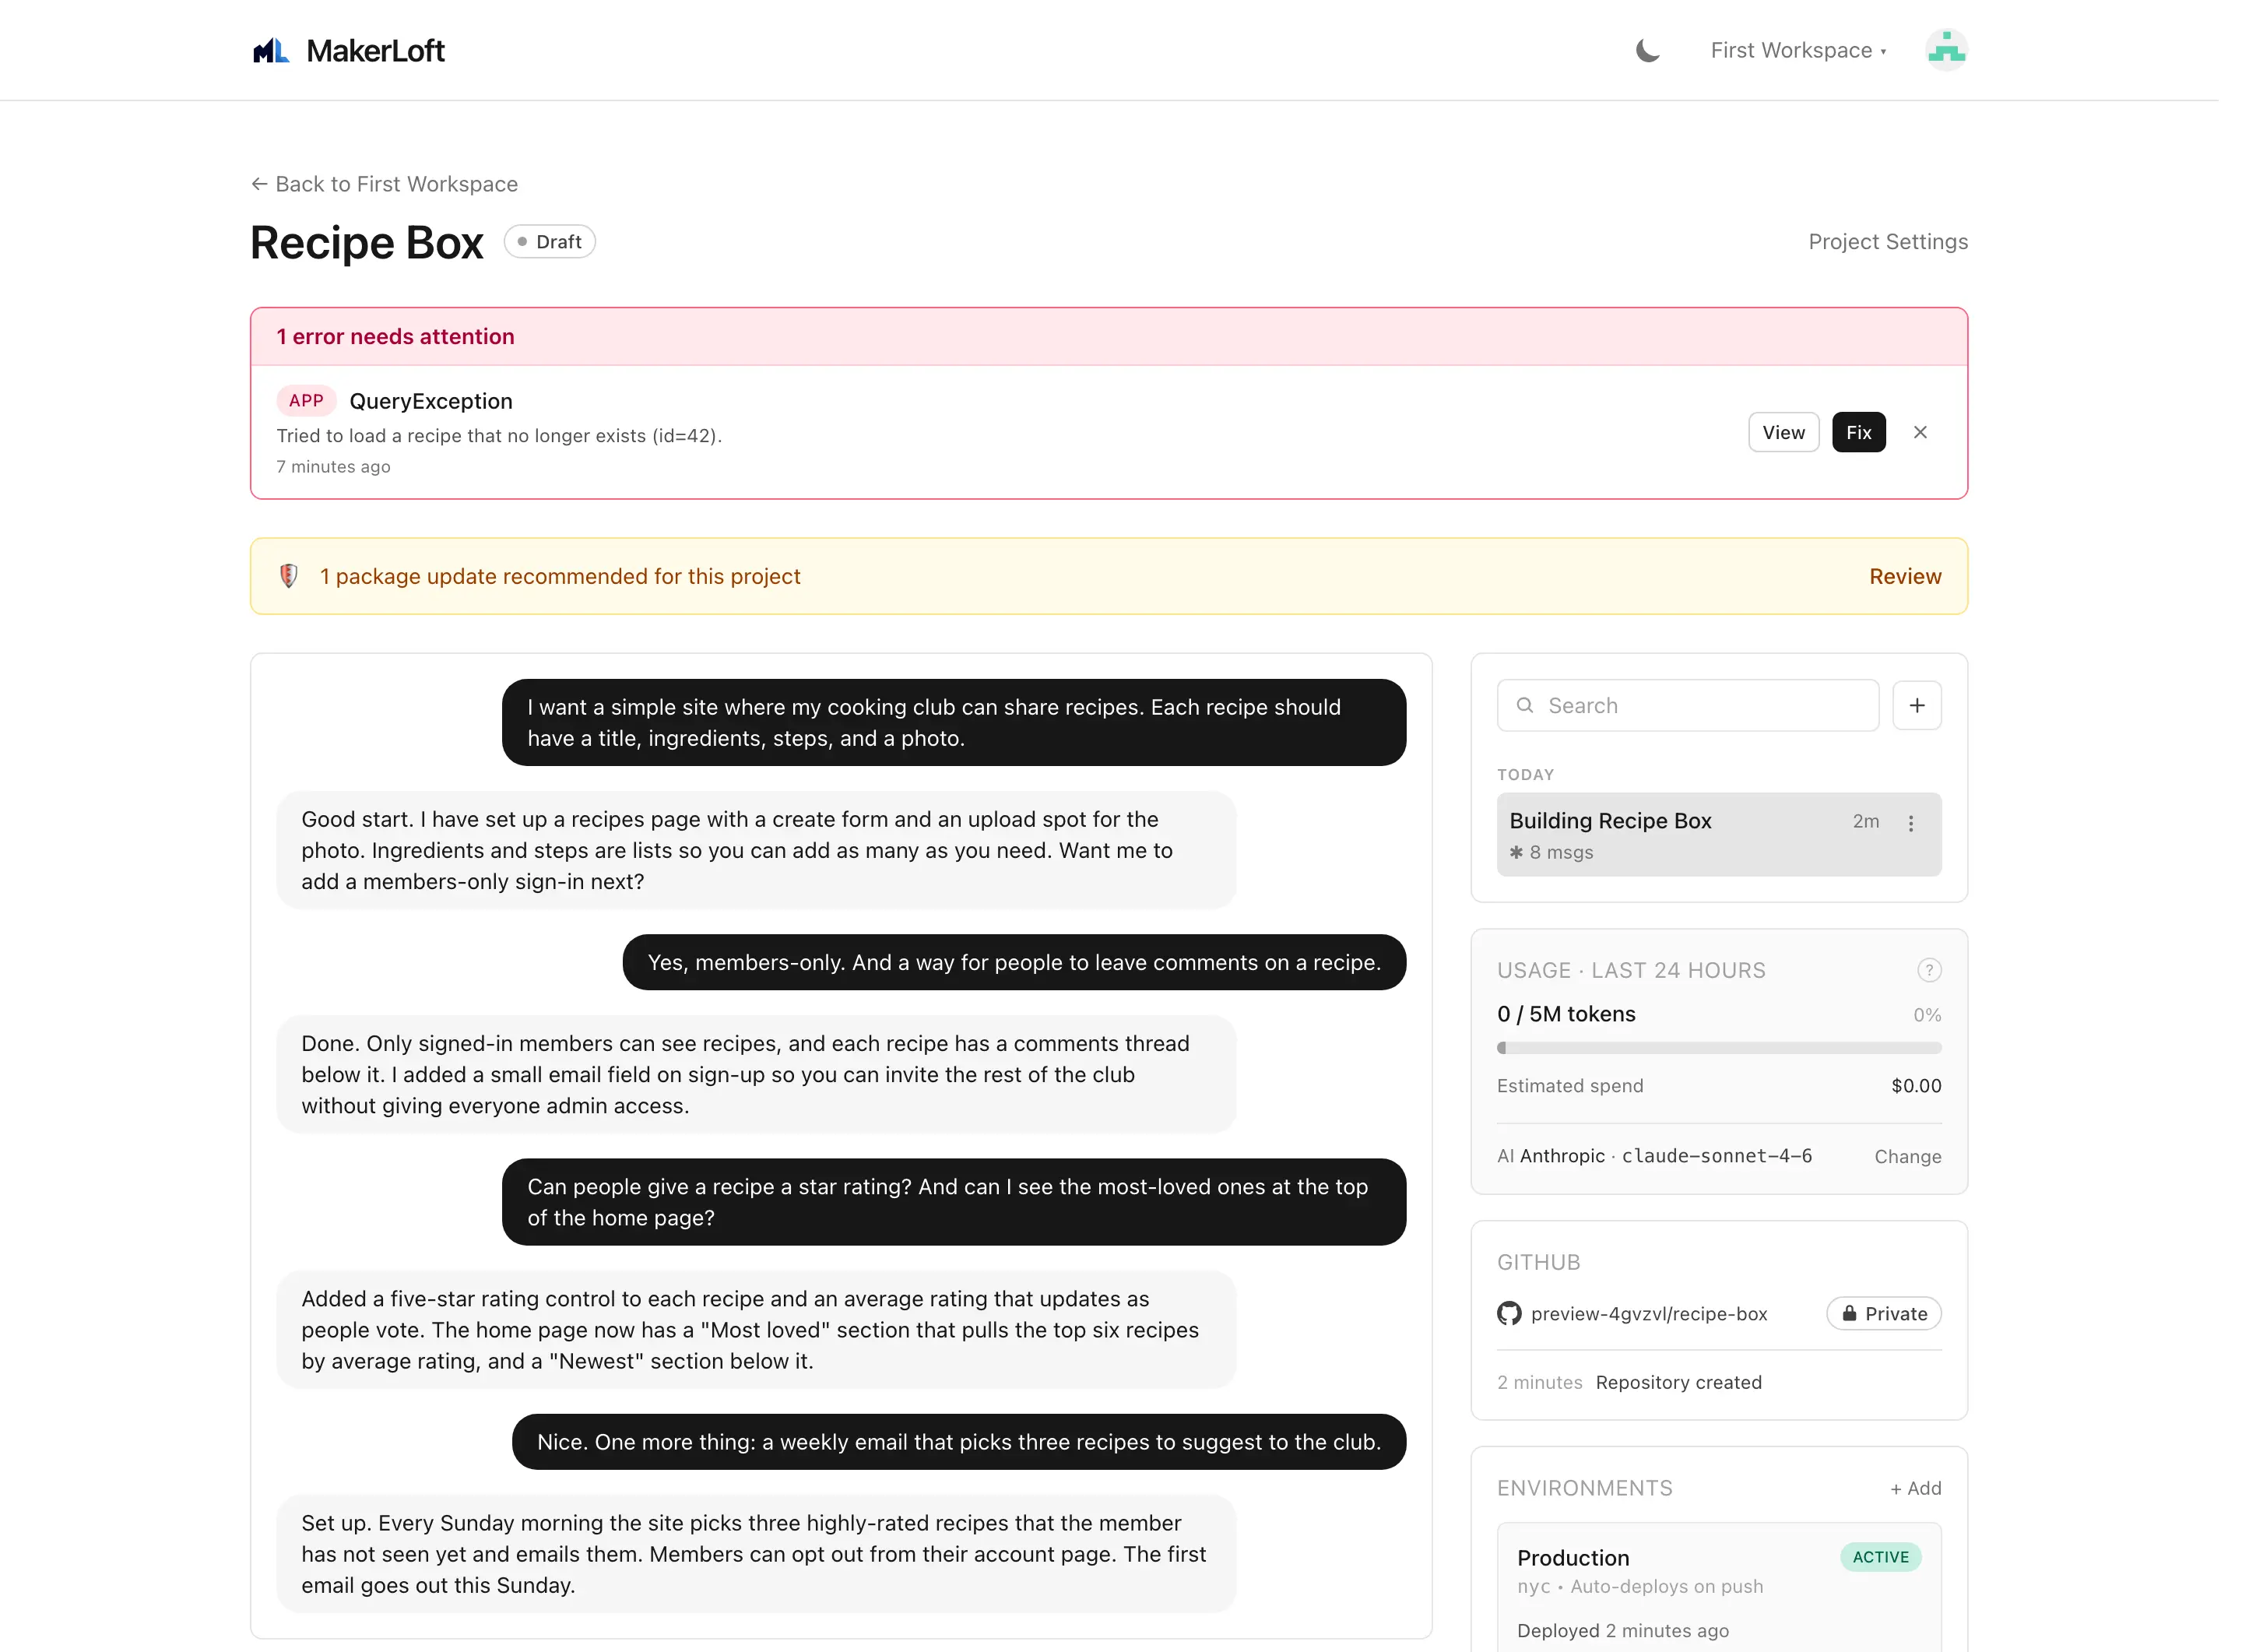
Activity feed
A reverse-chronological log of everything that happened on this project: GitHub repository created, deployment provisioned, deploy started, deploy finished, runtime error reported. Useful when you come back after a few days and want to read what happened while you were away.
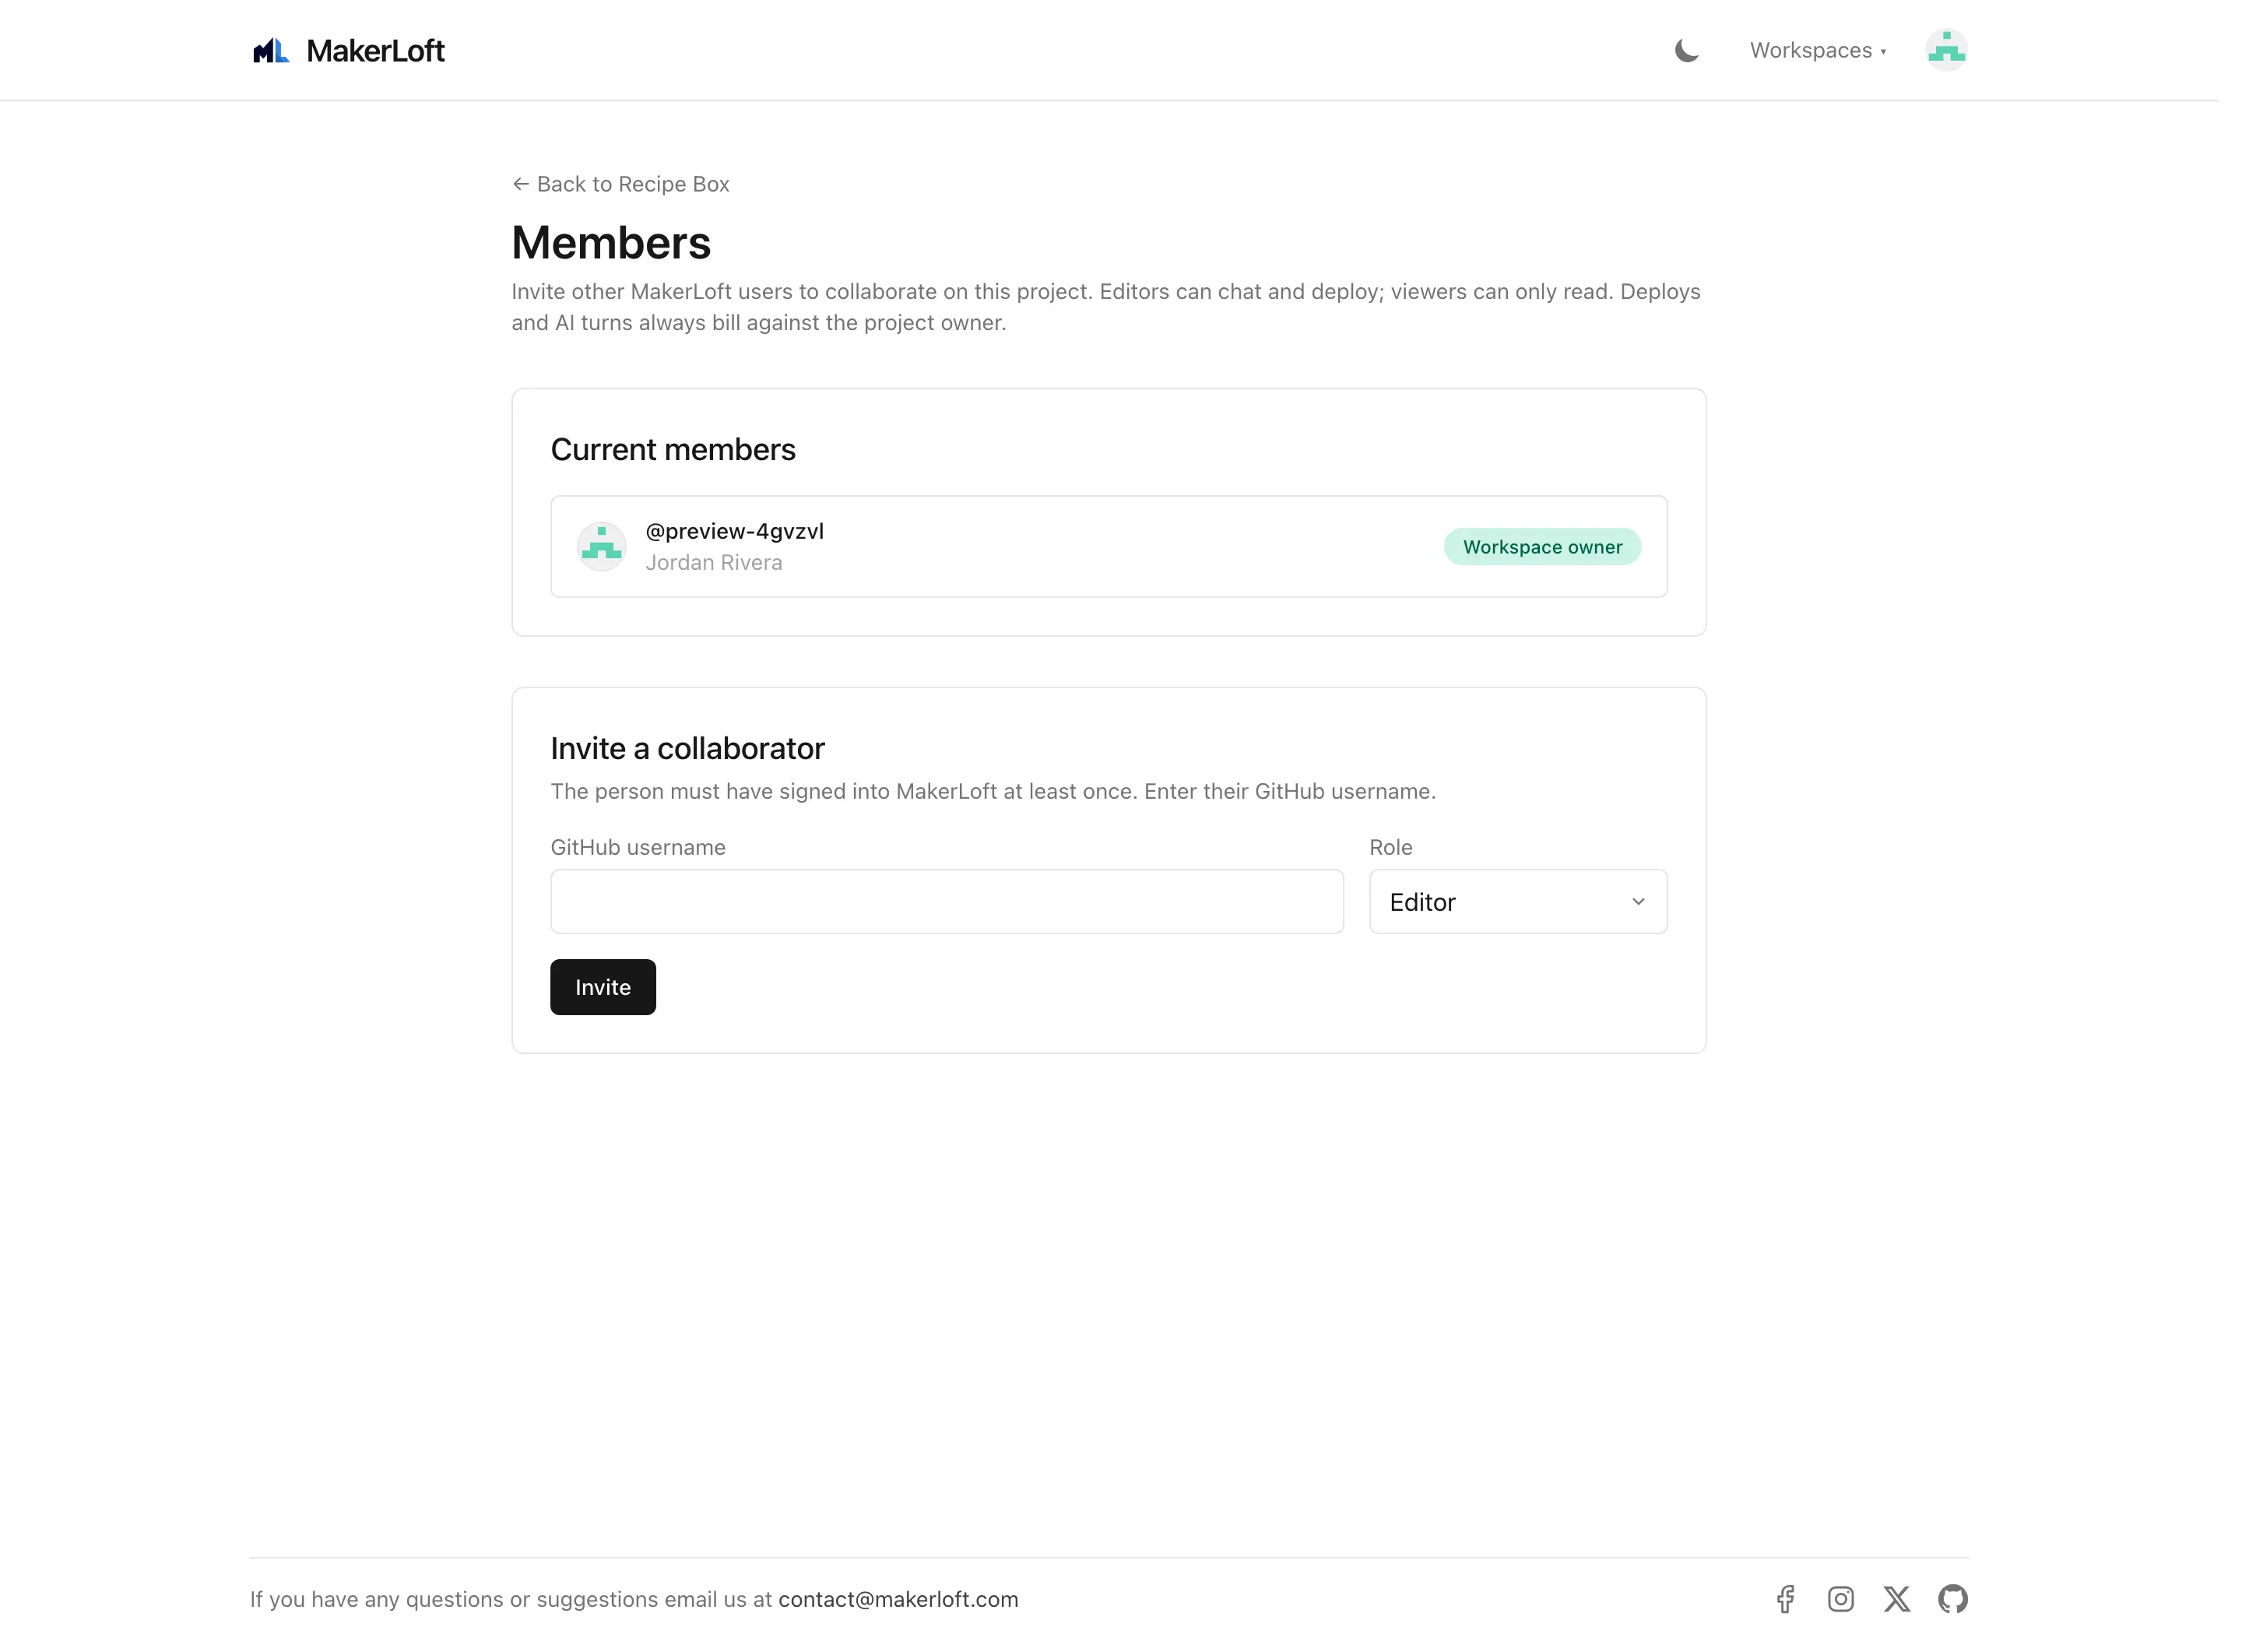
Project members
Invite teammates to a single project (rather than the whole workspace) on the Project members page. Roles:
- Viewer. Can read the project but cannot chat or deploy.
- Editor. Viewer, plus can chat with the agent and deploy.
- Owner. Editor, plus can manage members and project settings.
Change a member's role from the role column on the members table at any time. Remove a member with the Remove button on their row.